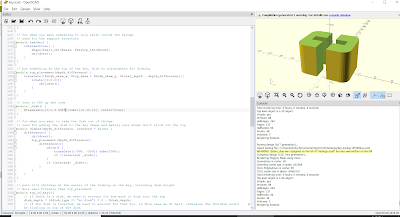
I cleared out the unnecessary remnants of my last model's code but kept approximately half of the measurements. The angle between the halves can change quickly, and I grabbed the keyswitch dimensions from the manufacturer.
I took my list of platform and board holder improvements and implemented them. There is room for an encoder, the parts fasten together with nuts and bolts, and it is more streamlined.
I started the keycap model for the project by scoping out someone who made an OpenSCAD program already. I couldn't extract the snippet I needed since they wrote an epic model, but I could isolate the stem I was after. Check out rsheldii and their awesome keycap.
I created the first draft of my hinged keycap. It should stick out the top of a keyswtich, and I can print the shaft any length I want. The top will fasten down with an M2 nut and bolt. There is room for a washer on either side between the circular pad and the tall shaft.
My first print attached perfectly to the keyswitch, so I made six different lengths to test ones that fit my fingers. Sadly, four of the six failed. I completely assembled and tried one, which worked smoothly.
I printed eight stems with square tops so they would stick to the plate better. 100% of them worked, and I made a complete set that allowed me to trigger the switches one at a time.
The rest of the summary posts have been arranged by date.
First time here?
Completed projects from year 1
Completed projects from year 2
Completed projects from year 3
Completed projects from year 4
Completed projects from year 5
Completed projects from year 6
Completed projects from year 7
Disclaimer for http://24hourengineer.blogspot.com and 24HourEngineer.com
This disclaimer must be intact and whole. This disclaimer must be included if a project is distributed.
All information on this blog, or linked by this blog, is not to be taken as advice or solicitation. Anyone attempting to replicate, in whole or in part, is responsible for the outcome and procedure. Any loss of functionality, money, property, or similar, is the responsibility of those involved in the replication.
All digital communication regarding the email address 24hourengineer@gmail.com becomes the intellectual property of Brian McEvoy. Any information contained within these messages may be distributed or retained at the discretion of Brian McEvoy. Any email sent to this address, or any email account owned by Brian McEvoy, cannot be used to claim property or assets.
Comments to the blog may be utilized or erased at the discretion of the owner. No one posting may claim property or assets based on their post.
This blog, including pictures and text, is copyright to Brian McEvoy.
Platform V6
I took my list of platform and board holder improvements and implemented them. There is room for an encoder, the parts fasten together with nuts and bolts, and it is more streamlined.
I started the keycap model for the project by scoping out someone who made an OpenSCAD program already. I couldn't extract the snippet I needed since they wrote an epic model, but I could isolate the stem I was after. Check out rsheldii and their awesome keycap.
I created the first draft of my hinged keycap. It should stick out the top of a keyswtich, and I can print the shaft any length I want. The top will fasten down with an M2 nut and bolt. There is room for a washer on either side between the circular pad and the tall shaft.
My first print attached perfectly to the keyswitch, so I made six different lengths to test ones that fit my fingers. Sadly, four of the six failed. I completely assembled and tried one, which worked smoothly.
I printed eight stems with square tops so they would stick to the plate better. 100% of them worked, and I made a complete set that allowed me to trigger the switches one at a time.
Different lengths for different fingers
The rest of the summary posts have been arranged by date.
First time here?
Completed projects from year 1
Completed projects from year 2
Completed projects from year 3
Completed projects from year 4
Completed projects from year 5
Completed projects from year 6
Completed projects from year 7
Disclaimer for http://24hourengineer.blogspot.com and 24HourEngineer.com
This disclaimer must be intact and whole. This disclaimer must be included if a project is distributed.
All information on this blog, or linked by this blog, is not to be taken as advice or solicitation. Anyone attempting to replicate, in whole or in part, is responsible for the outcome and procedure. Any loss of functionality, money, property, or similar, is the responsibility of those involved in the replication.
All digital communication regarding the email address 24hourengineer@gmail.com becomes the intellectual property of Brian McEvoy. Any information contained within these messages may be distributed or retained at the discretion of Brian McEvoy. Any email sent to this address, or any email account owned by Brian McEvoy, cannot be used to claim property or assets.
Comments to the blog may be utilized or erased at the discretion of the owner. No one posting may claim property or assets based on their post.
This blog, including pictures and text, is copyright to Brian McEvoy.


Comments
Post a Comment