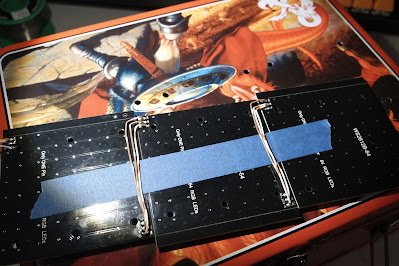
I tried fixing the last two troublesome buttons with debouncing software, but the issues were beyond code capabilities. I dug into the problem, and they both worked after reflowing their solder joints which was great news because I thought I demolished one of the buttons during installation.
The following connections I focused on were the potentiometer and OLED screen. I probably mounted the slide upside-down, but I'll confirm that when I'm coding. The screen was straight-up broken. I must have overtightened the screws because I found cracks in the glass, but I replaced it and got the live value to show on the screen.
I designed and printed a slider to go on top of the potentiometer. It's not a particularly inspired design, but it says "Velocity" on the top, so at least it's custom. After the picture, I painted the lettering in black, and it looks much better.
The following prints were spacers for the micro USB ports and some brackets to hold the faceplate off the bottom of the lunch box. Neither were a lot of trouble, but they'll both be helpful soon, and it seemed like a good day to tidy up some of the loose ends.
I drilled holes in the lunch box cover to mount my LED panels. Next, I wired them up with power at each end and data between the three units. I probably should have paid better attention to their orientation when I set them up.
I found an excellent video about a college student who made an incredible model roller coaster, but more importantly, he outfitted it with genuine industrial controls and sensors. Industrial hardware isn't cheap, but he was given a controller and screen through the college.
The rest of the summary posts have been arranged by date.
First time here?
Completed projects from year 1
Completed projects from year 2
Completed projects from year 3
Completed projects from year 4
Completed projects from year 5
Completed projects from year 6
Completed projects from year 7
Completed projects from year 8
Disclaimer for http://24hourengineer.blogspot.com and 24HourEngineer.com
This disclaimer must be intact and whole. This disclaimer must be included if a project is distributed.
All information on this blog, or linked by this blog, is not to be taken as advice or solicitation. Anyone attempting to replicate, in whole or in part, is responsible for the outcome and procedure. Any loss of functionality, money, property, or similar, is the responsibility of those involved in the replication.
All digital communication regarding the email address 24hourengineer@gmail.com becomes the intellectual property of Brian McEvoy. Any information contained within these messages may be distributed or retained at the discretion of Brian McEvoy. Any email sent to this address, or any email account owned by Brian McEvoy, cannot be used to claim property or assets.
Comments to the blog may be utilized or erased at the discretion of the owner. No one posting may claim property or assets based on their post.
This blog, including pictures and text, is copyright to Brian McEvoy.


Comments
Post a Comment